
Company
A leading manufacturer of industrial-strength labels also makes specialized printers and design software for their unique materials.
New Product Design
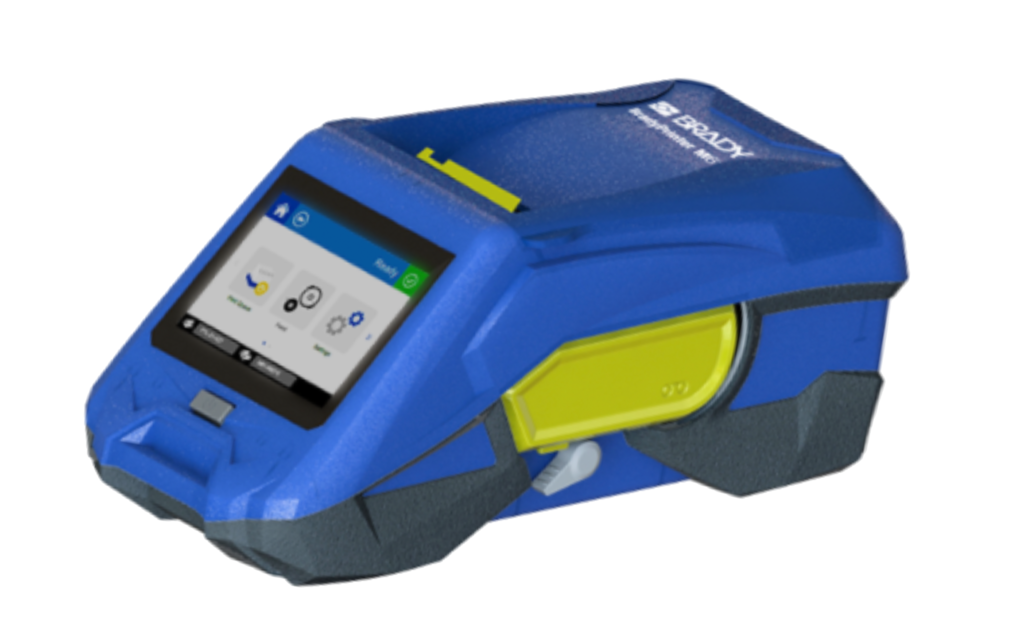
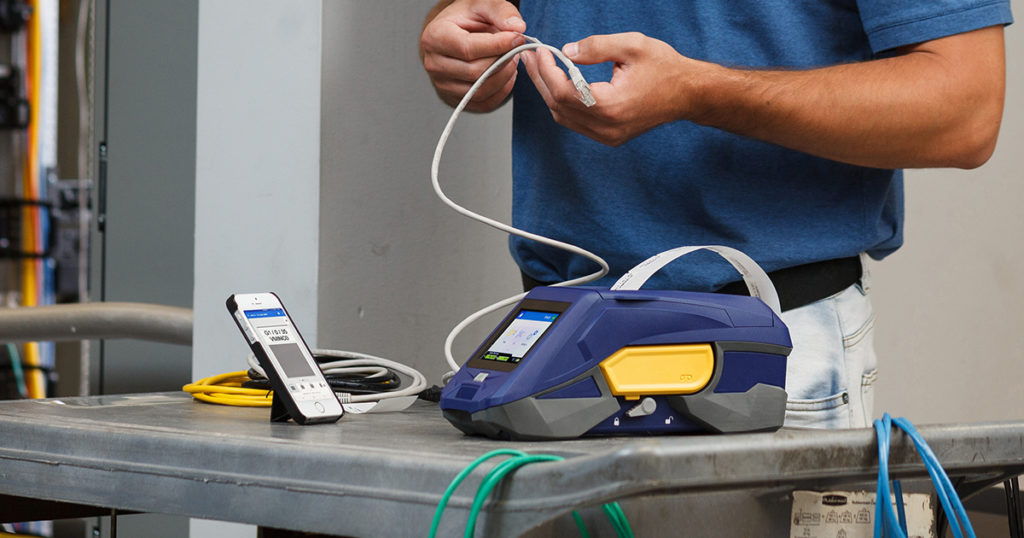
A portable label printer driven by a mobile app, used by field technicians such as network installers, electricians, plumbers, and so on.

Ask
Printers normally take 2-3 years to develop. However, this advanced system was promised for delivery in just 1 year. I was chosen to design the printer and its mobile app with lean resources in a “fail fast” environment.
When
December 2017-August 2018 (9 month project)
My Team
 Global Product Manager
- Product Owner
 Lead product designer (me, 5 years of experience)
- Designer
- Industrial designer
- Tech writer
- Project manager
- Software developers
- Project manager
- Quality assurance testers
Risks and Constraints
- Solution is predetermined by a stakeholder.
- Technology platforms are predetermined by a stakeholder.
- Extremely compressed timeline.
- Steep learning curve as no in-house talent has any previous experience with the technology platform.
- Standalone handheld printers already exist. This product might not be solving the right problem.
- Previous smartphone apps have not been very successful because they added little value to standalone handheld printers.
- Previous research shows that older technicians do not like using smartphone apps.
Step 1 – Market Research
Several questions needed to be answered before product development could begin:
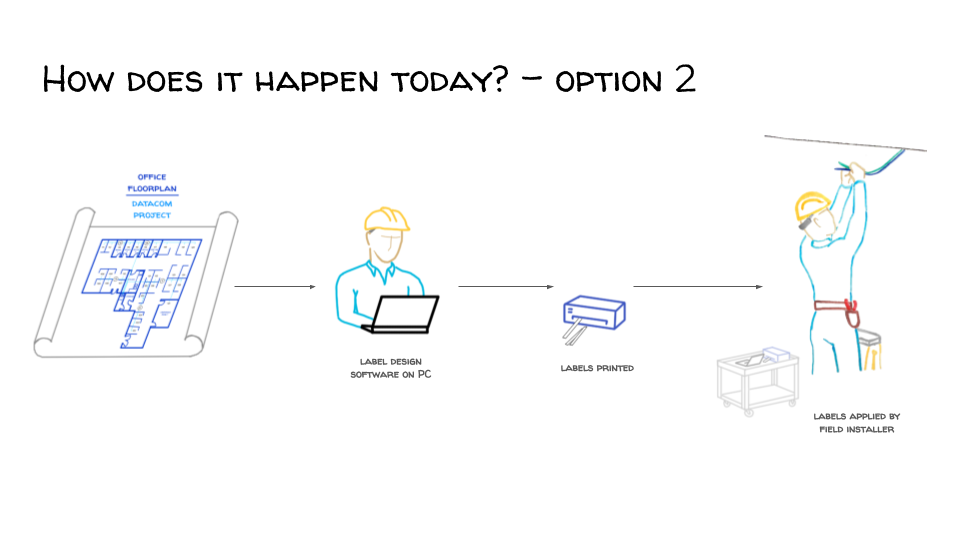
- How do field technicians print labels in the field today?
- Do field technicians use smartphones for their jobs?
- Do field technicians share files with their smartphones?
- If so, how do they share files (email, cloud storage, etc)?
- Would field technicians be interested in ways to reprint existing labels from a file?
- Would field technicians be interested in ways to print new labels directly from a blueprint?
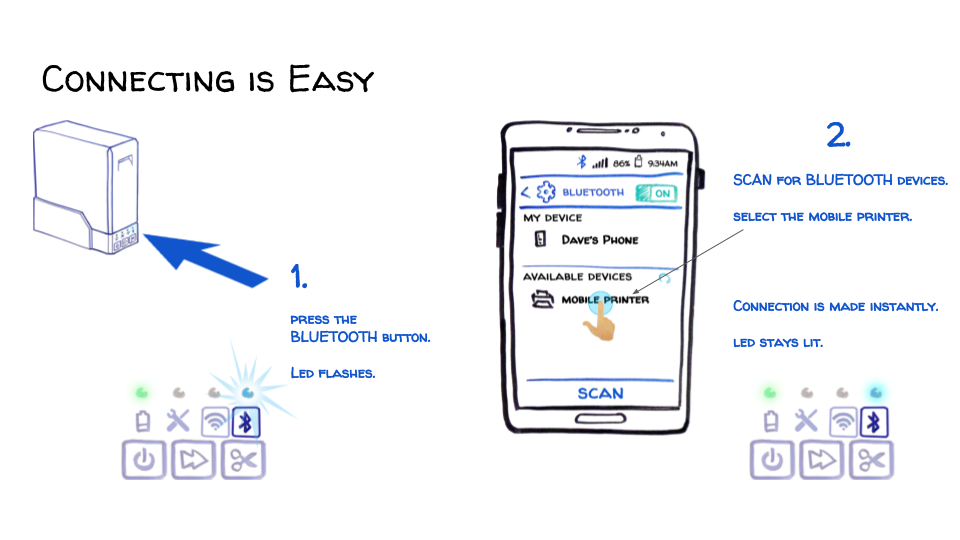
- Do field technicians understand how to connect devices to their smartphones?
- If so, which connection method is preferred (USB, WiFi, Bluetooth)?
- Would field technicians be interested in a portable printer?
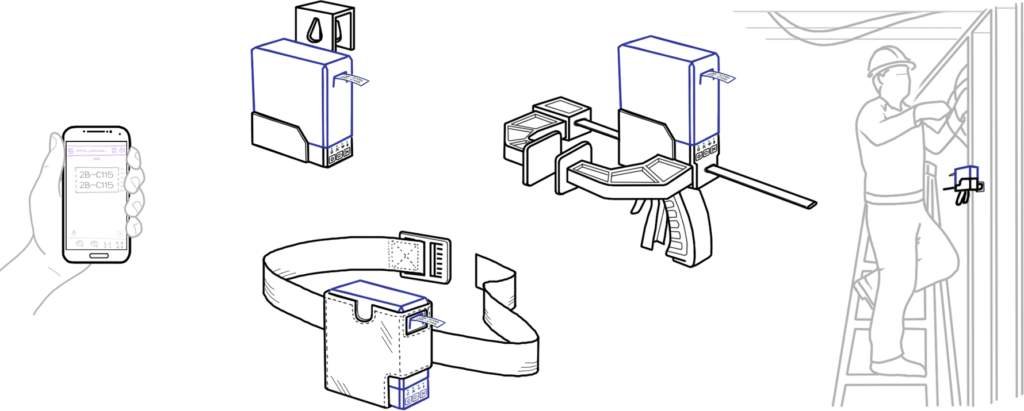
- Would field technicians be interested in a wearable printer?
- Would field technicians be interested in a printer that could be used from atop a ladder?
- Do field technicians think our concept of a portable printer is at the right price point?
Research Preparation
(1 month)
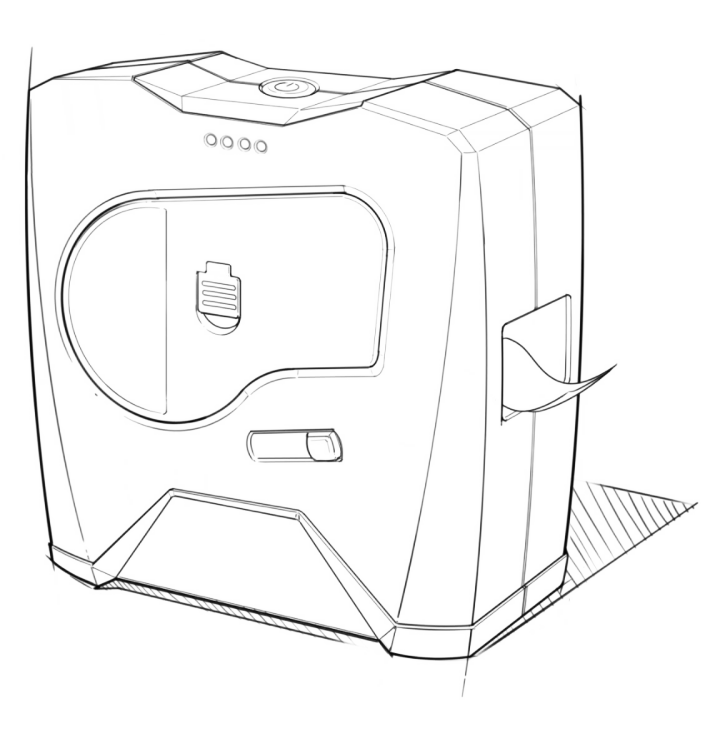
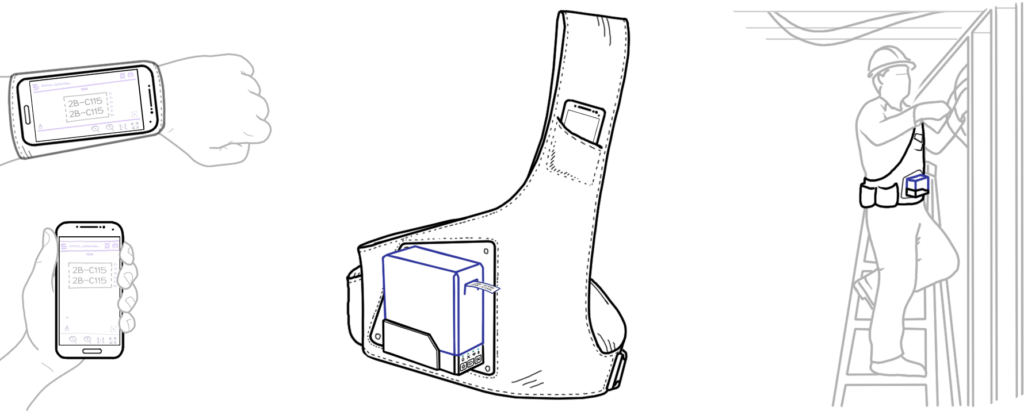
My industrial designer and engineering teams made rough mockups of the concept printer and accessories.
Meanwhile, I began by creating several illustrations as conversation aids, as well as a few high level conceptual user flow sketches.
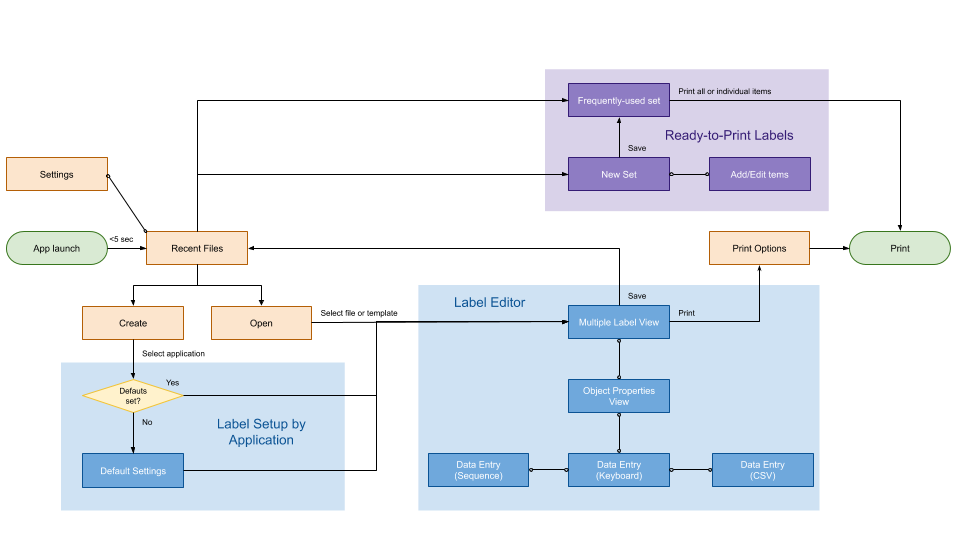
I attempted to understand what the typical user flow is like.


I attempted to gauge level of understanding of Bluetooth, and if it was preferred.
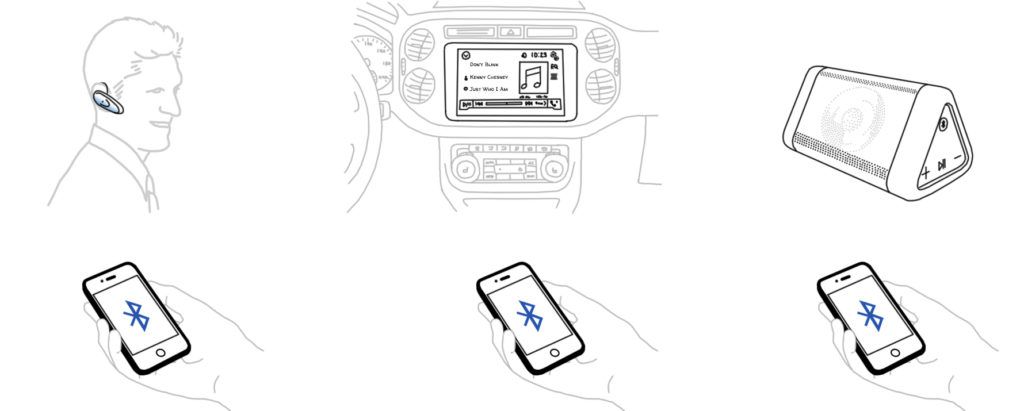
I attempted to gauge level of understanding of sharing files across devices.
I attempted to gauge interest in the concept of a printer and mobile app solution.


I attempted to understand the ideal way of printing labels in the field, if such a concept were real.

I showed illustrations and mockups of printer accessories, including wearable gear.
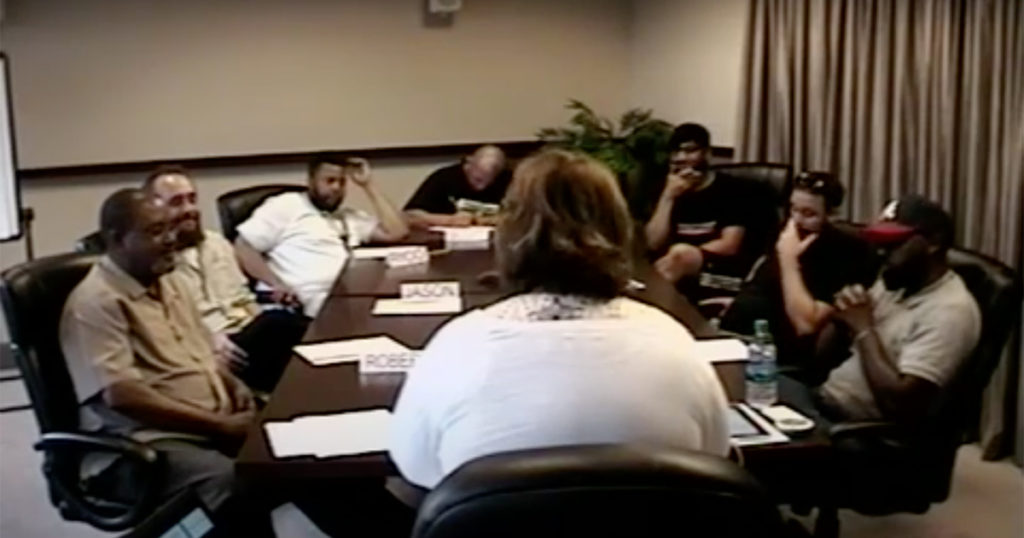
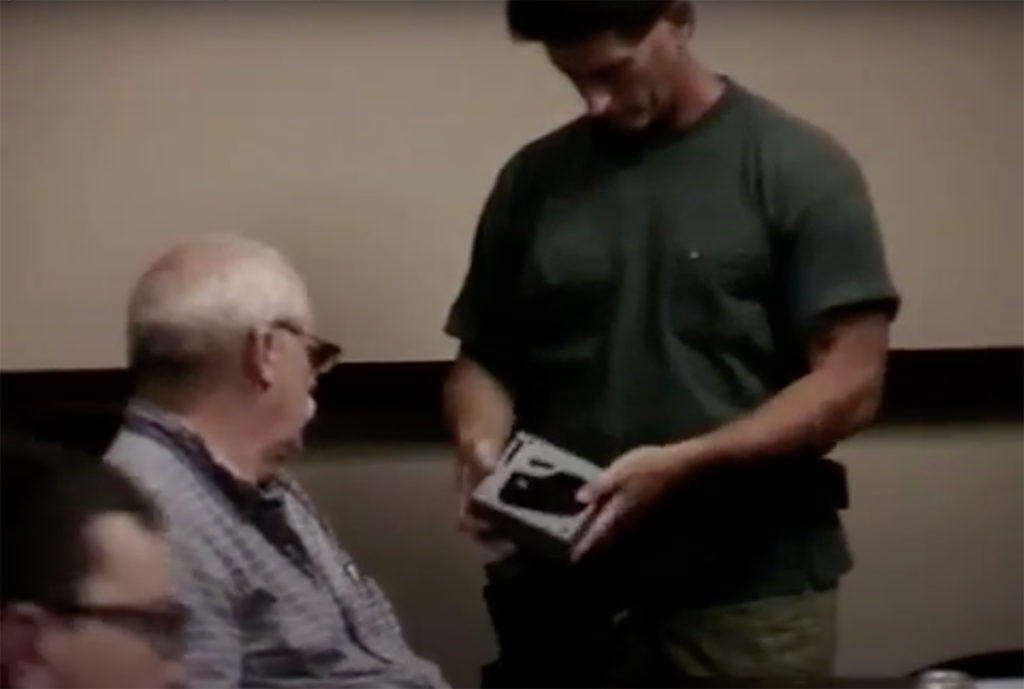
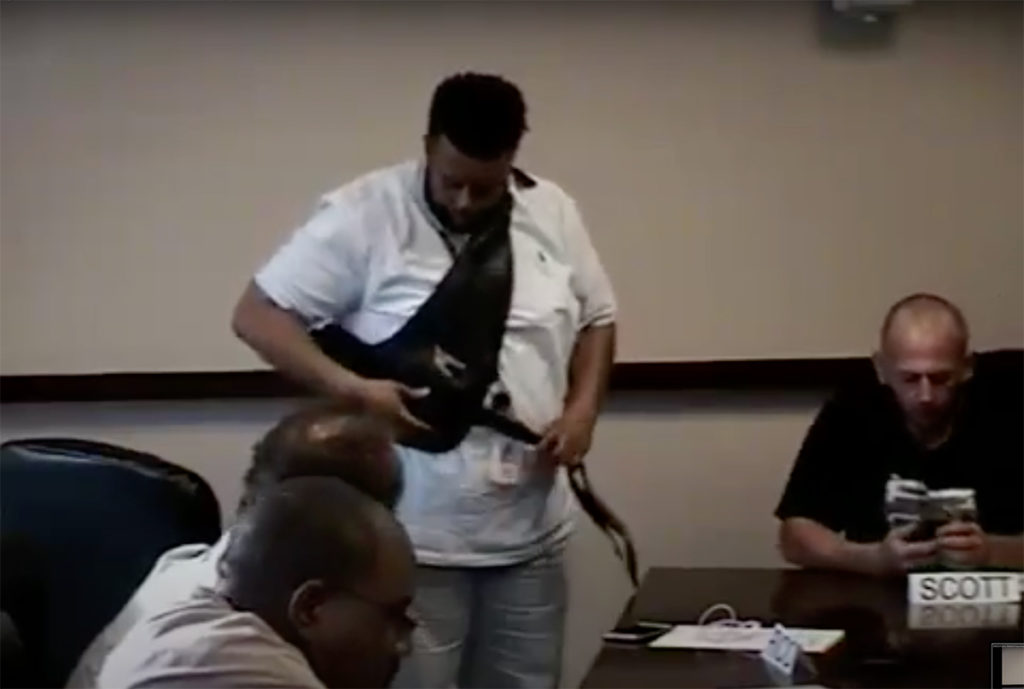
Focus Groups
2 days, 16 participants
I guided conversations around label printing using the illustrations above.
I also showed physical mockups of printer and wearable accessories.
Major findings
- Almost all use a smartphone for work.
- Proposed solution is at the appropriate price point.
- Printing is usually not done in the field, but might be preferred.
- Good understanding of Bluetooth, and it is preferred.
- Strong interest in the ability to share label designs with coworkers, using all methods.
- A solution that could interact with their project plan software seemed far-fetched, or magical.
- Concern that the proposed solution requires 2 devices that are battery powered, where a failure in either would leave the user without the ability to print.
- Strong desire in a printer powered by readily-available alkaline batteries to avoid recharging in the field.
- No interest in a touch screen unless it allowed the printer to operate standalone (without a mobile app).
- No interest in a wearable printer.
Step 2 – Project Strategy
Stakeholder System Requirements
- Must have significantly more capabilities and a better user experience than any standalone handheld printer on the market.
- Must take advantage of smartphone platform, including pinch-zooming.
- Must support dozens of languages.
- Must be fully compatible with legacy files from desktop software.
- Must include a touch screen (against market research).
- Must include a non-replaceable battery (against market research).
- Must include wearable accessories (against market research).
My Tactical Decisions
- I introduced a design system that could be used across all tech platforms. (Material)
- I limited the mobile app requirement to smaller displays (smartphones). Larger displays (tablets) were supported, but not optimized.
- I used metrics to make the case for Bluetooth support as the primary connection method, despite the need for a more expensive chip set to meet Apple certification standards.
- Engineering risk was greatly reduced by re-using the printing chassis from an existing handheld model.
Solving a Legacy Problem
(1 week)
All legacy printers were unclear about how the label on the screen was oriented compared to the label that would exit the printer. Users would often get undesirable results.
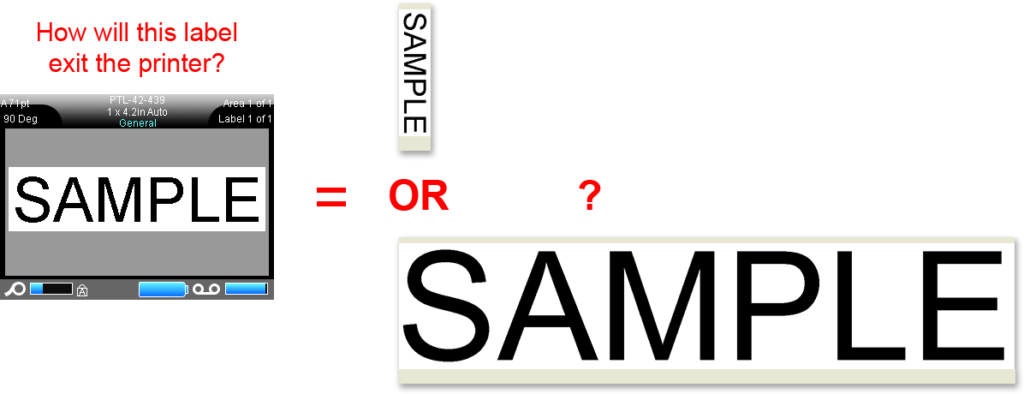
I solved this by creating a visual language to describe the orientation of any shape, size, or type of label supply right in the editor.

Step 3 – Designing a Basic Editor
(1 month)
High-Risk Items
These features had never been created on a mobile app, previously.
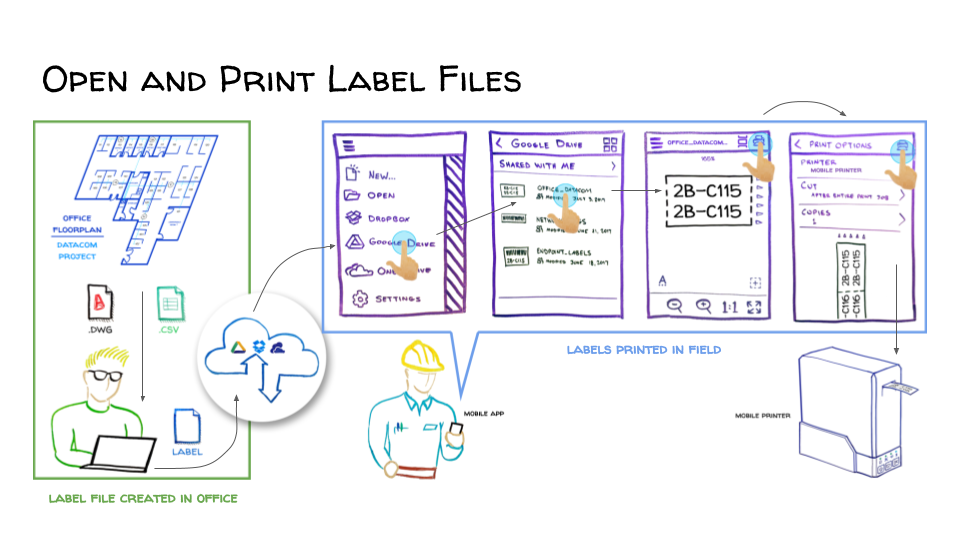
- A way to open existing label files (designed on a desktop program).
- A way to print frequently-used labels without designing them from scratch.
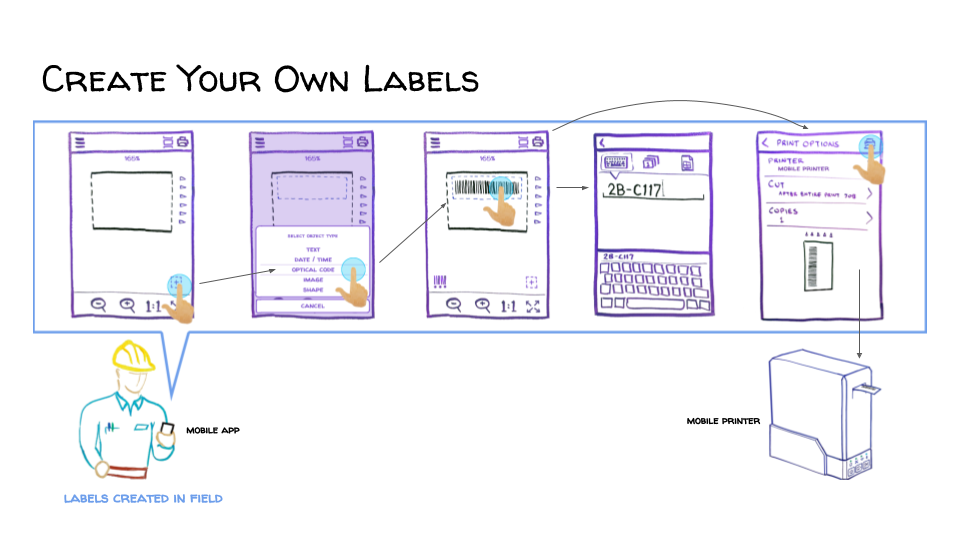
- A way to design labels with manually entered text.
- A way to design and view multiple labels in a set.
- Labels with generated sequences of numbers
- Labels with imported data
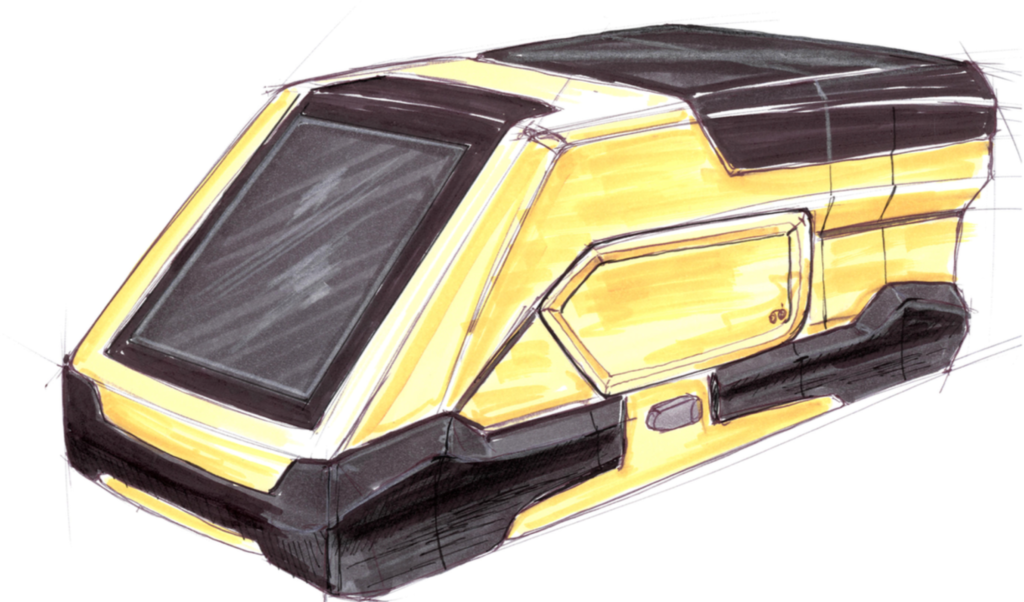
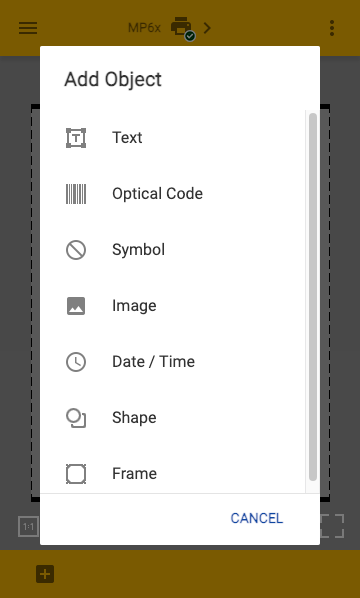
Axure was used to create a functional prototype that accepted custom user input. The printer itself was yellow, so I designed the UI to match.

Usability Testing Results
- Add Object menu was well-understood by all participants.
- Zoom controls were somewhat unclear.
- Text formatting and bounding box icons were not understood.
Step 4 – Designing Navigation Between Files & Features
(1 month)
Automation vs Manual
Before designing content, the user would need to select their type of label supply. Some of this could be automated thanks to communication with the printer. But other options would need user intervention. I had to revise the user flow to account for this.
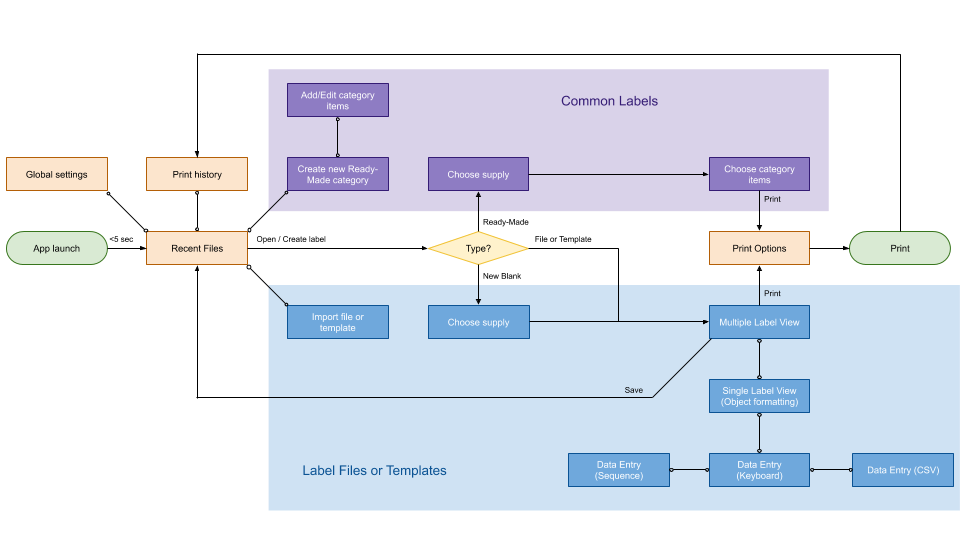
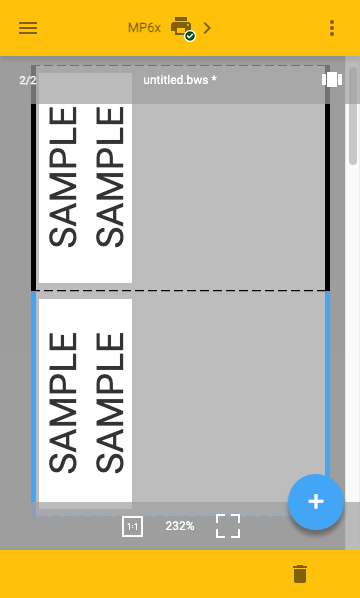
Managing Multiples
This next round of design provided extra controls for viewing and managing multiple labels at once.
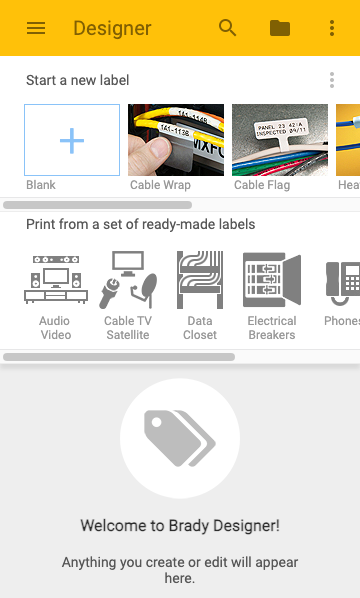
I added a Home screen. I also made the Axure prototype more functional by adding a text entry field, formatting controls, and controls for sequence generators and imported spreadsheets.
Usability Testing Results
- Home screen’s Start New Label feature was well understood by most participants.
- Menu to Print from a set of ready-made labels was not a popular feature.
- Multiple label view was not comprehended.
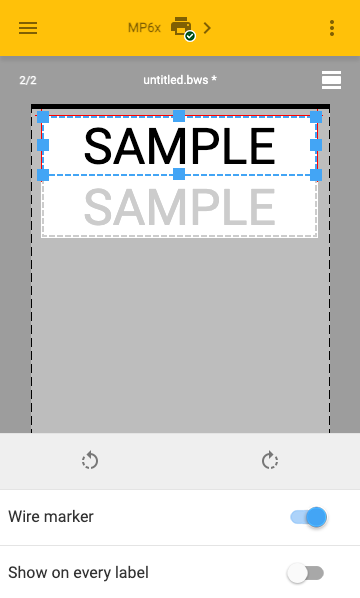
- Single label view editor had well-understood formatting controls.
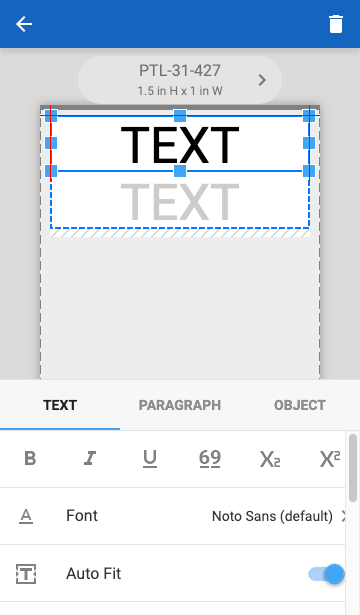
- Most participants had trouble navigating between object properties and text formatting controls.
- Some participants had trouble understanding how to enter text because their virtual keyboard obscured the text entry field.
- Most participants had trouble submitting text by using the blue checkmark.
Step 5 – Simplifying the Editor
(4 months)
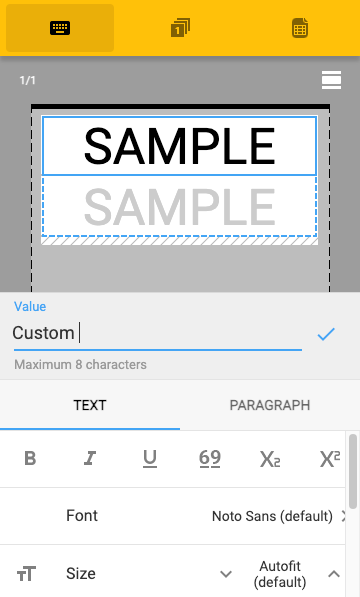
New Look, Better Controls
I made several usability improvements:
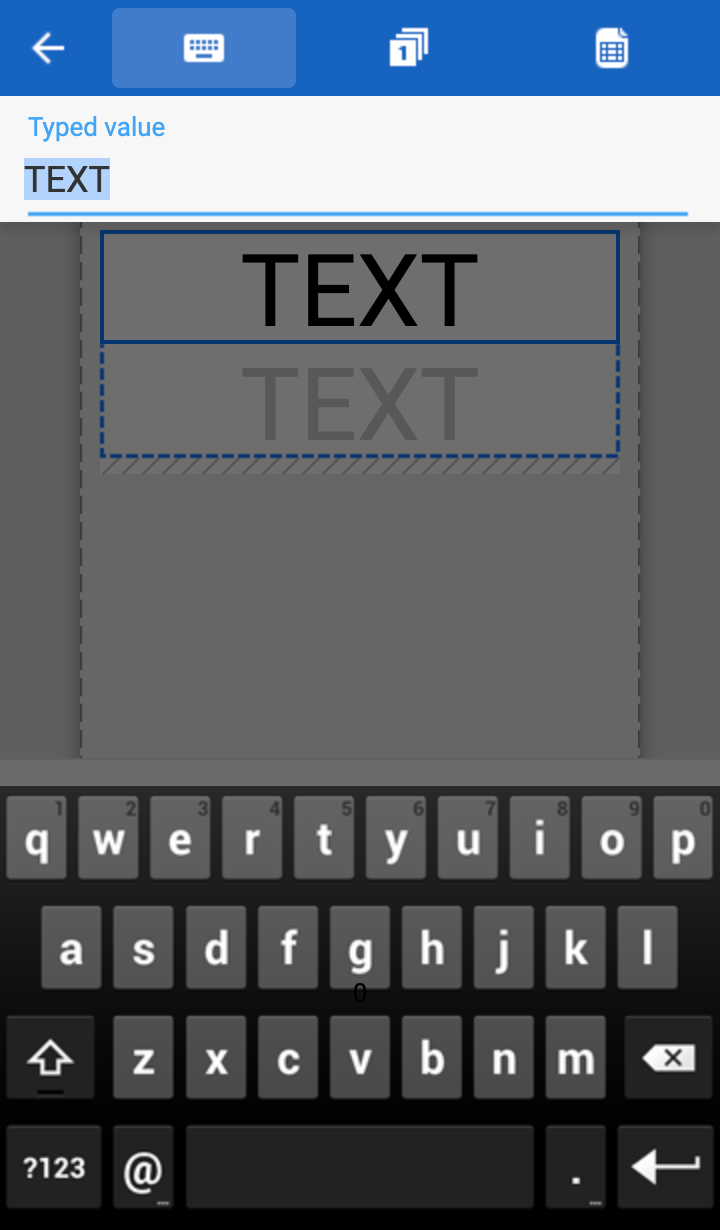
- Moved menus and text entry field to the top bar to prevent them from being obscured by the keyboard.
- Improved zoom controls.
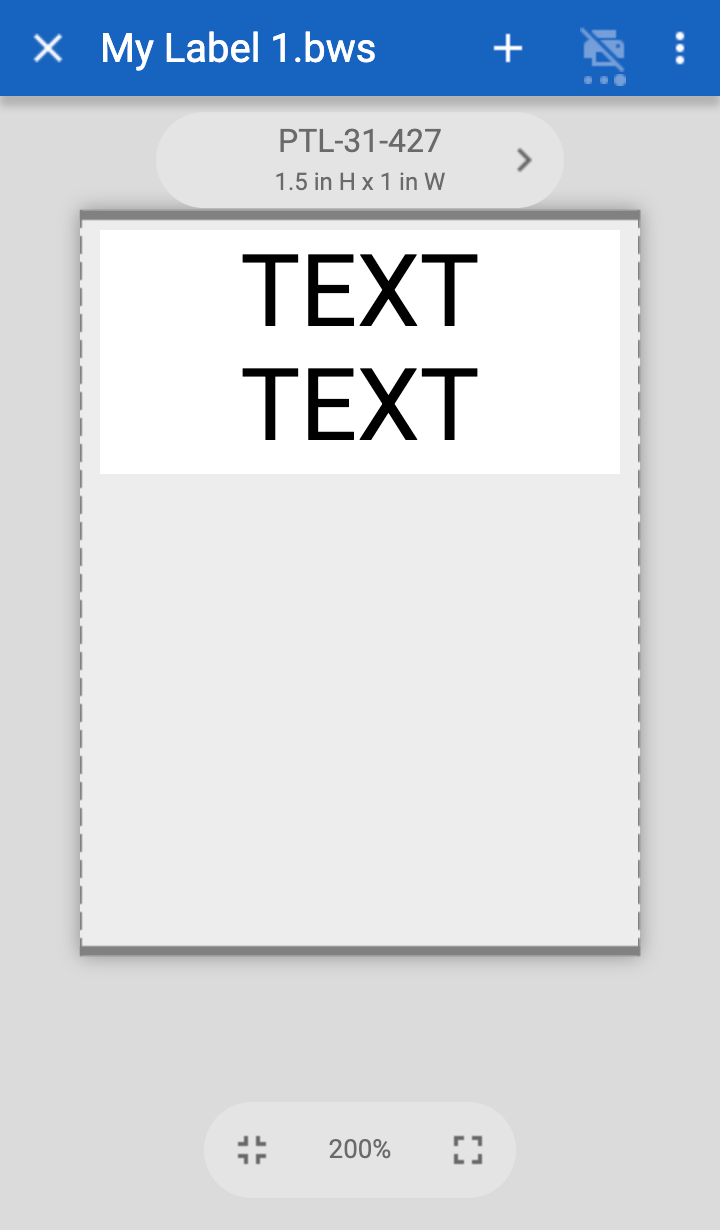
- Added label supply information so users could see the size of their label at a glance.
- Move printer controls to a right sidebar menu. When collapsed, this menu shows the connected printer status at a glance.
- Added a new ribbon control across the bottom, allowing users to easily navigate through multiple labels within the same document.
- Drew attention to the blue checkmark button by adding a pulsing blue halo.
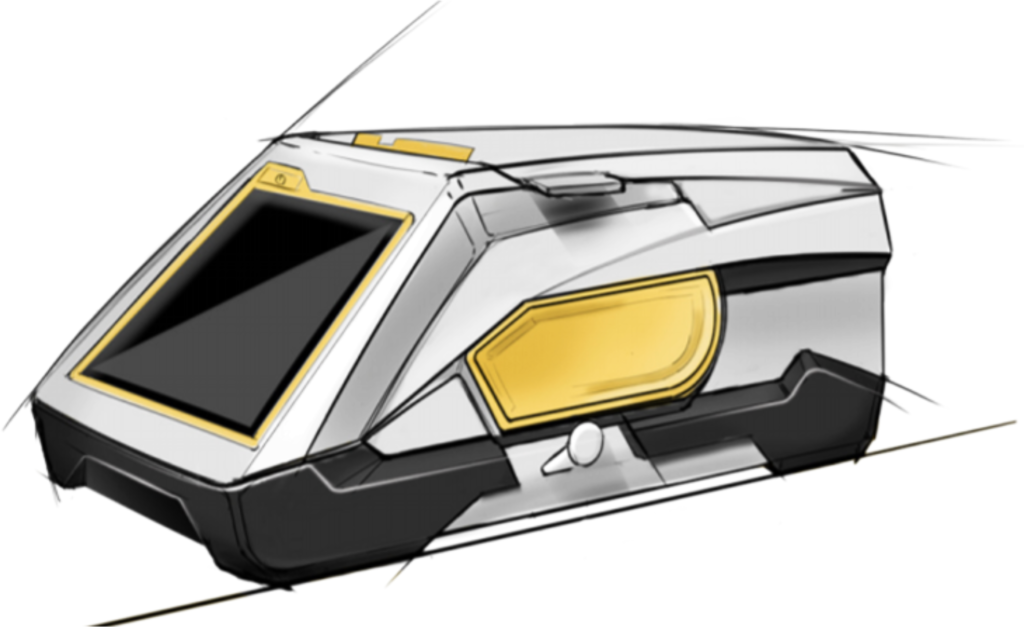
The printer’s housing design had changed to a blue color, so I updated the UI to match.
Usability Testing Results
- Most participants were able to easily comprehend the components in the editor and use the majority of the formatting controls.
- Most participants still had trouble exiting the text entry field. Clearly, the pulsing blue checkmark was the wrong approach.
- Many participants still had trouble navigating between property sheets.
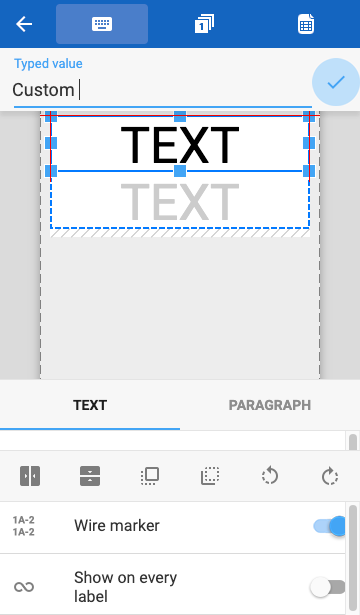
More Usability Improvements
- Consolidated all property sheets into a bank of tabs, making them easier to find.
- Covered the view with a scrim when the text field had focus. Tapping it would exit the text field, eliminating the need for the blue checkmark.
Usability Testing Results
- All participants were able to navigate to all property sheets.
- All participants intuitively understood how to use the scrim to exit the text field.
- Formatting controls were well understood.
- Sequence generator and spreadsheet import controls were well understood.
- Saving, opening, and sharing files was well understood.
- Again, the Home screen menu to Print from a set of ready-made labels was not a popular feature.
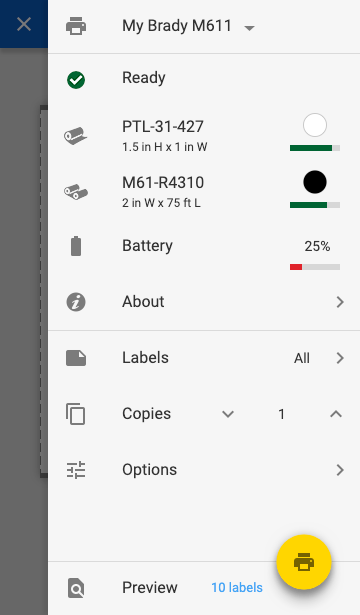
Step 6 – Designing the Printer Connection
(2 months)
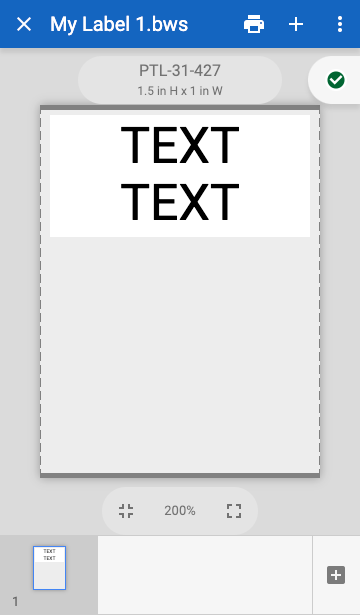
App as a Remote Control
Usability improvements included:
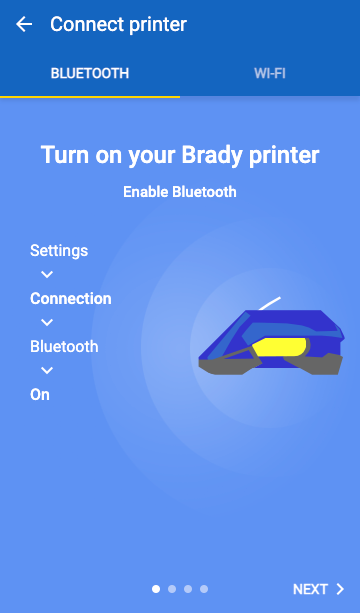
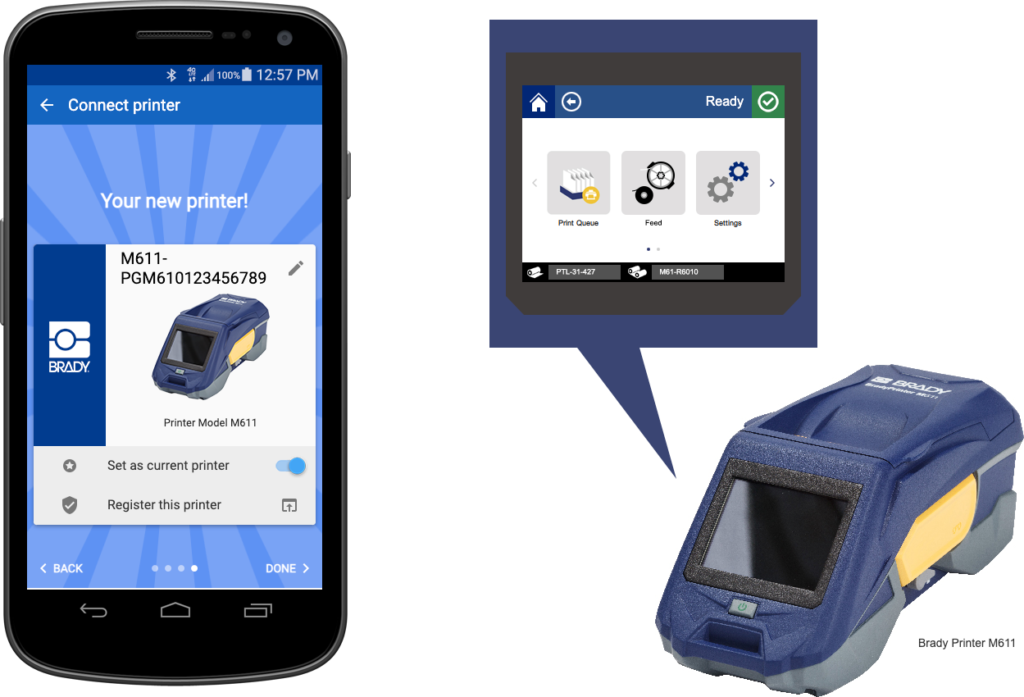
- A first-time printer connection wizard.
- Moved the printer status to the top bar.
- A right menu that included important printer status information, print options, a print preview, and the ability to select from a list of available printers.
- Hid the multiple-label navigation ribbon from view by default, as users would typically only create one label at a time.
- Removed the unused Print from a set of ready-made labels feature from the home screen and the app entirely.

When these advanced prototypes ran on a smartphone web browser, they were a close approximation to the real mobile app. Some usability testers even temporarily forgot that they were interacting with a prototype.
Testing a Printer that Doesn’t Exist Yet
We needed a way to validate the process of pairing the mobile app with the printer. At the time, we only had working prototypes of the mobile app UI and the firmware UI, but none of the communication between them. Since the printer hardware had not been built yet, I created an advanced Axure protype that simulated the communication between the two systems.
Usability Test Results
- All participants were able to successfully run the connection wizard and pair the printer with the phone via Bluetooth.
- Printer status was easily found by all users.
- Print options were intuitive to most users.
Final Design
Device Testing
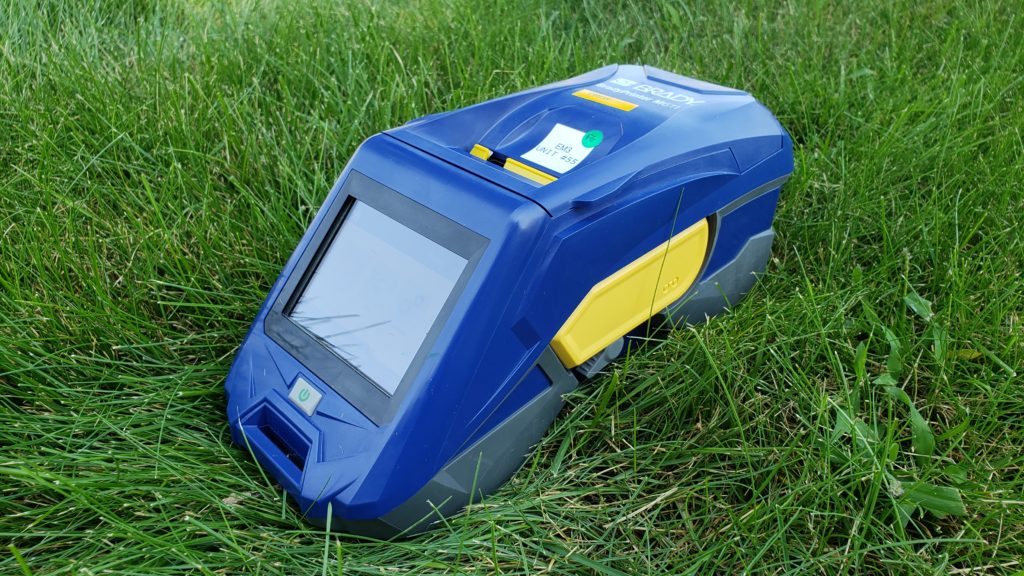
Just 1 week before my deadline, the functional printer finally became available to me. It had already passed QA testing, but I only got my hands on one as the project was wrapping up.
I ran a few guerrilla tests against coworkers out on the office lawn. Largely, the entire experience worked just as my team and I had engineered it.
Development Team Support
Designers were embedded within their respective development teams (software, firmware). We attended all project ceremonies, and were always available to provide immediate design clarification or provide additional work for developers or QA engineers.
- Design documentation, including expected behavior and UI specs
- Graphical assets, such as icons or illustrations used in the product
- Terminology or copy used in the product
- Rapid design revisions to overcome unforeseen technical challenges
- Usability testing of the device using 3D printed mockups and early manufacturing prototypes
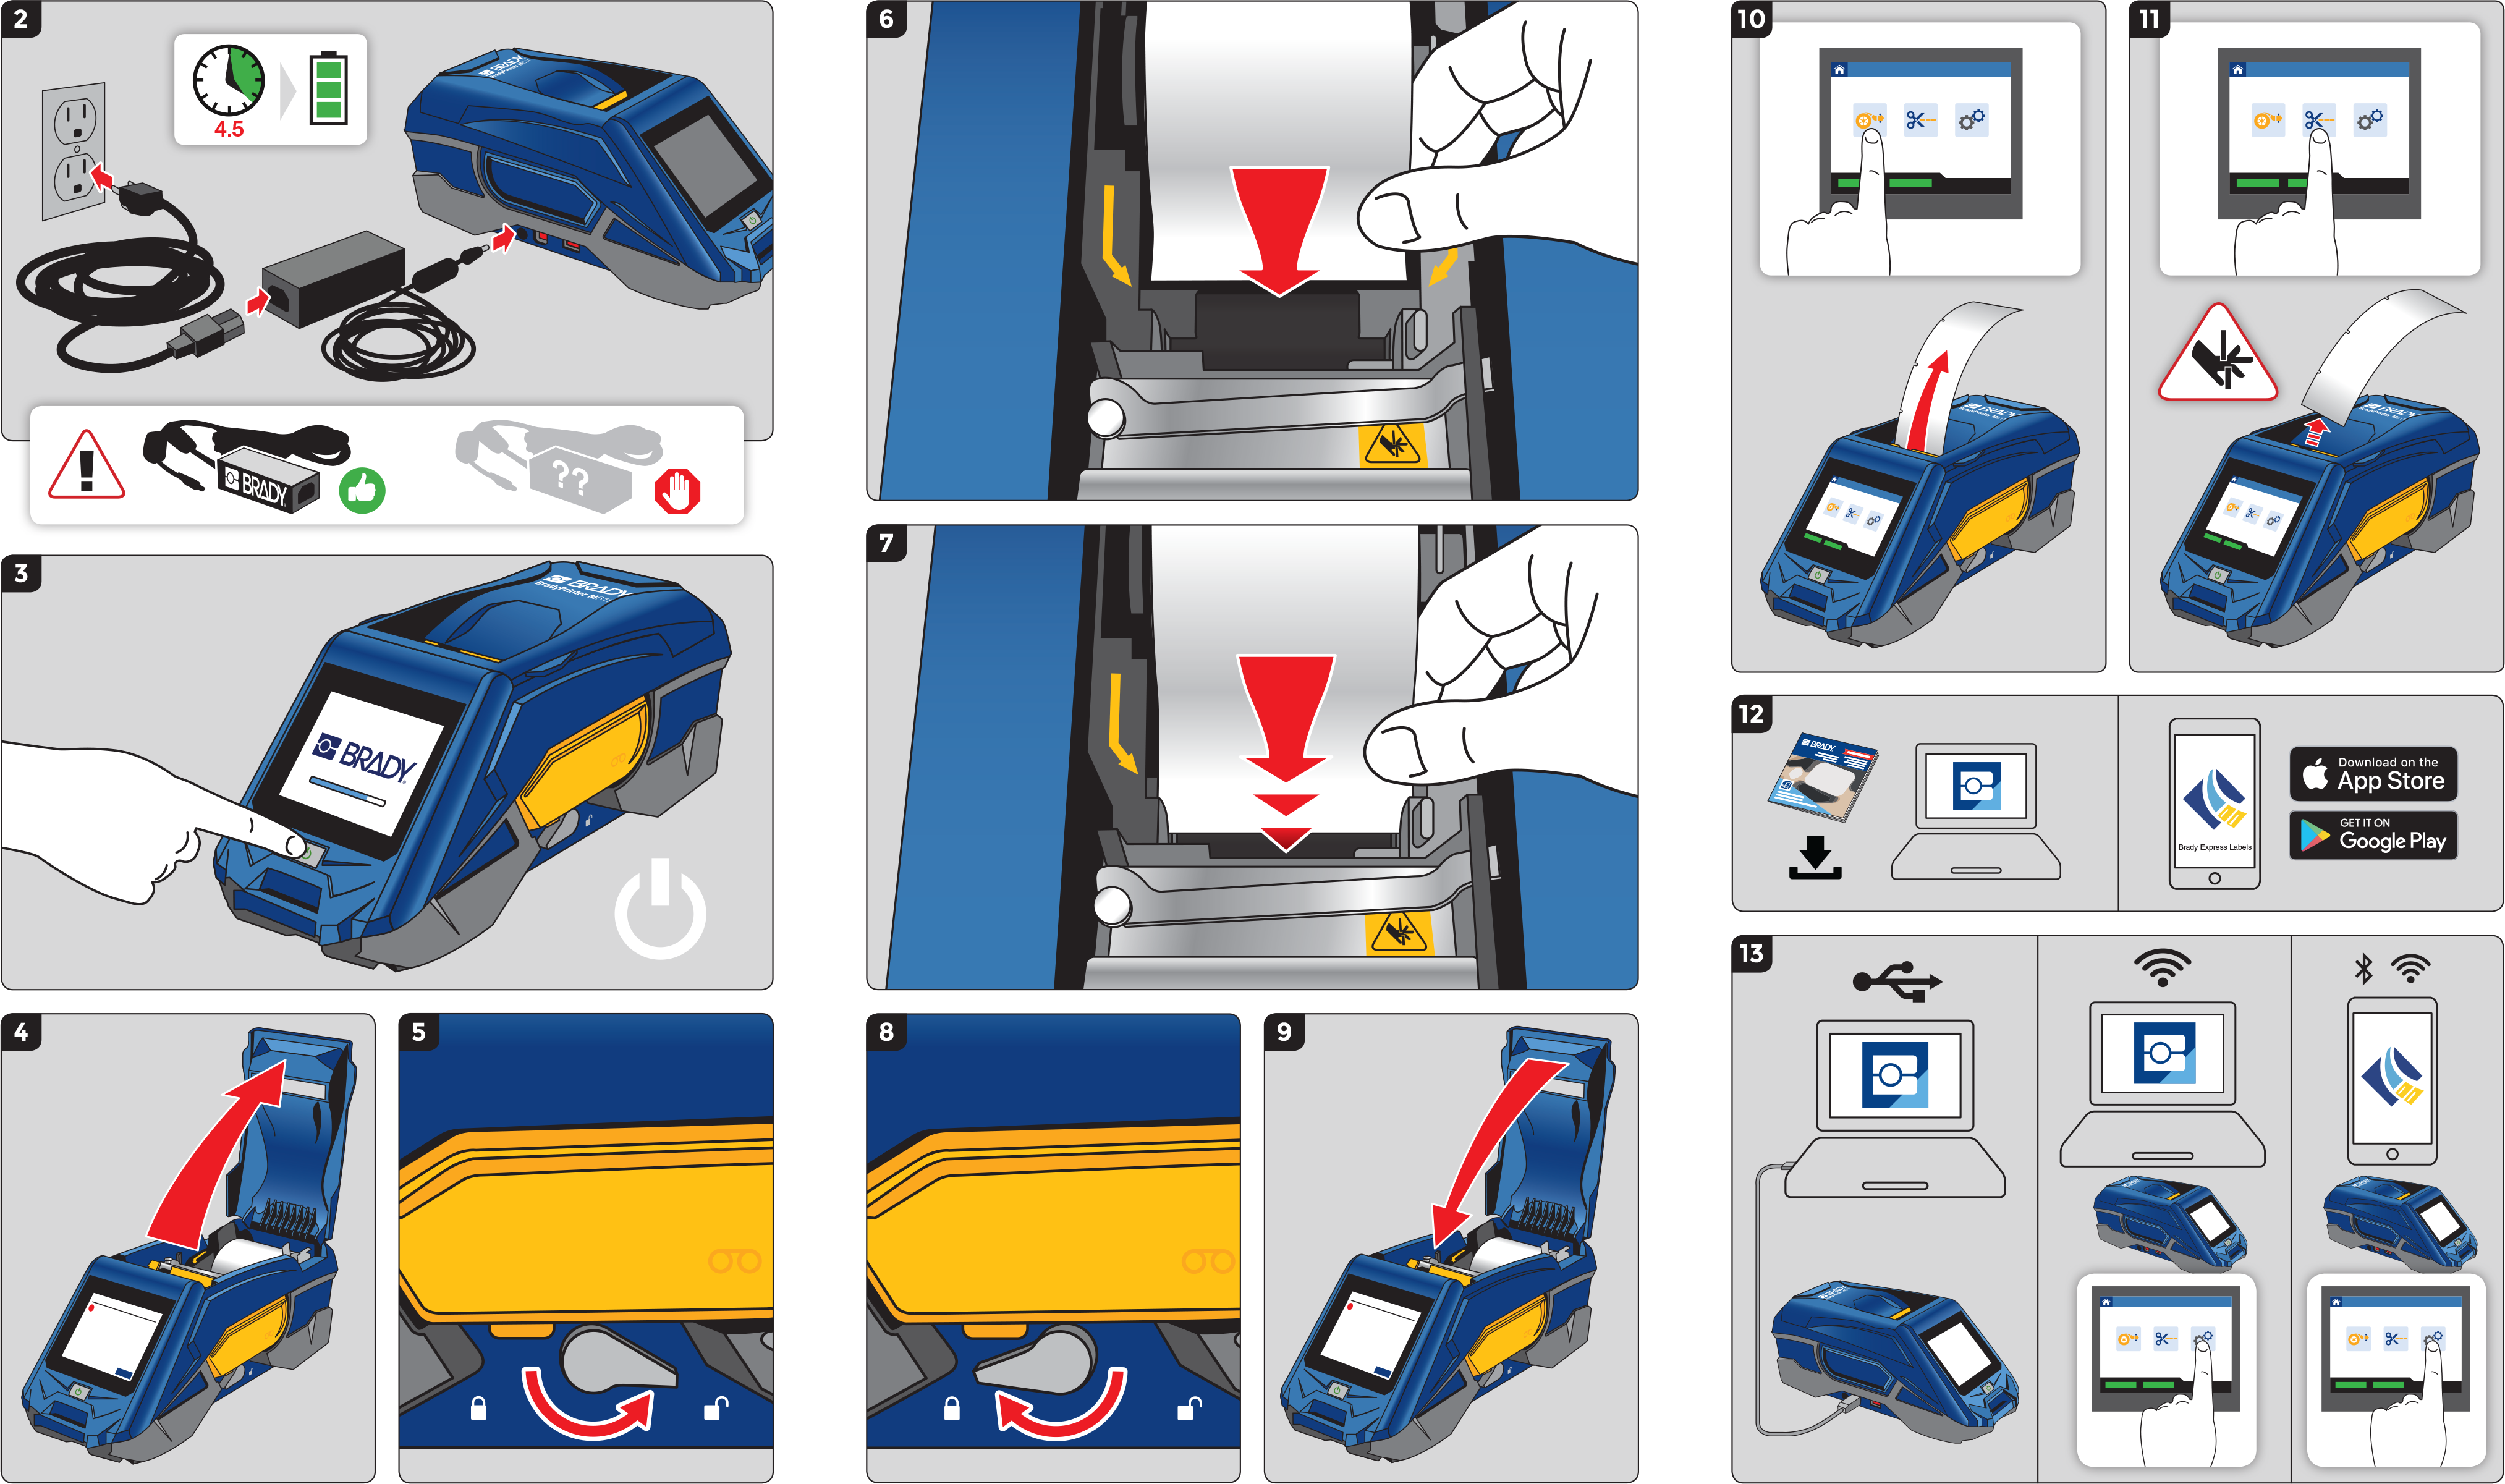
- Creation of product quick start guide
- Creation of marketing collateral, such as screenshots and promotional graphics for app stores
Additionally, I supervised and supported the tech writer who authored the device user manual and online help documentation.
Solo Work
Working at this speed for 9 months meant a lot of long hours, late nights, and working on weekends.
- 6 major iterations
- 221 minor iterations
Additional Leadership and Supervision
- Developing a growing design team
- Device industrial design
- Device firmware design
- Tech writer supervision
- Graphic designer supervision
I was unwilling to compromise on a quality user experience, an accessible design, a scalable design system, usability testing, or an incomplete feature set.
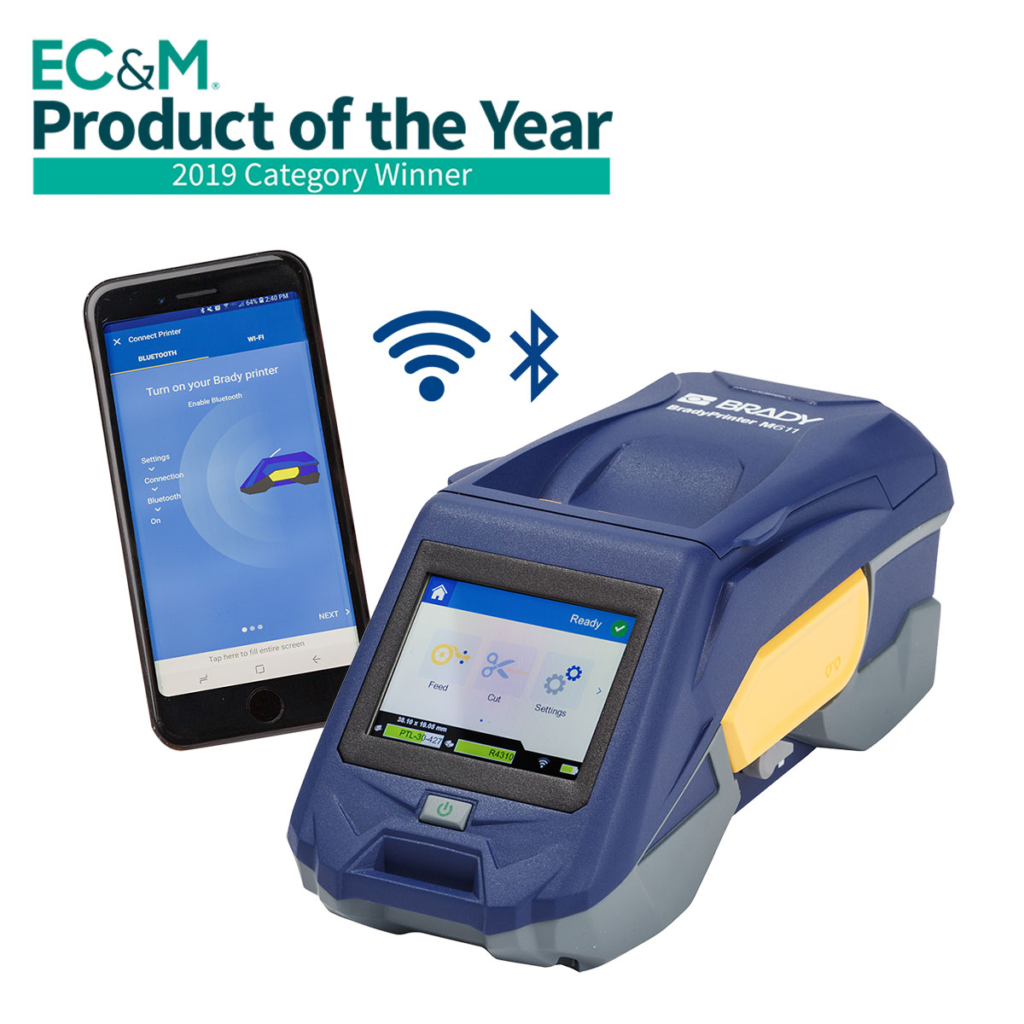
Finished Product
Results
This product was extremely successful, but not always for the reasons we imagined.
- Half of all consumers never used the device as a portable printer with a mobile app. Instead, they enjoyed the printer’s affordable price and small footprint while connected to their desktop computer.
- Those who did use the mobile apps found the interface to be the most intuitive and efficient design the company had ever produced. Many preferred to use the mobile apps instead of the desktop design software suite.
- Customers felt misled about the device connectivity, because the Bluetooth option only worked with the mobile app I designed, and not universally with other devices such as desktop computers or 3rd party software.
- Some customers asked for tablet optimization.
- Predictably, the wearable accessories were not popular.
Immediate positive sales and industry accolades highlighted the overall success of the product in its first 6 months on the market.
Today, the best practices from this project are being used on other initiatives:
- Design system is being adopted by all software and firmware, including the legacy desktop software suite.
- Modular components are being considered for new device designs.
- Mobile apps and firmware platforms have expanded to support:
- New market segments beyond electricians, including pipe fitters and laboratory technicians.
- More printer models and connection types.
What I Learned
- How to adapt Axure to make advanced simulators and design system documentation.
- How to create multi-sized icon assets using Sketch.
- How to create Lottie animations using After Effects.
- How to design for multi-device experiences.
- How to manage a lean design team under pressure.